Google Prettify Overview
Interested in adding rich formatted code to your website or blog? One challenge that is often faced is presenting sample code in a consumable format. There are several different open-source syntax highlighter JavaScript libraries out there. However, for the purposes of this article, I will be Google Prettify. A library that is able to recognize the syntax for your without having to specify the programming language.
Source: https://github.com/google/code-prettify
Getting Started with Google Prettify
First, we begin by registering the Javascript Library on your master page.
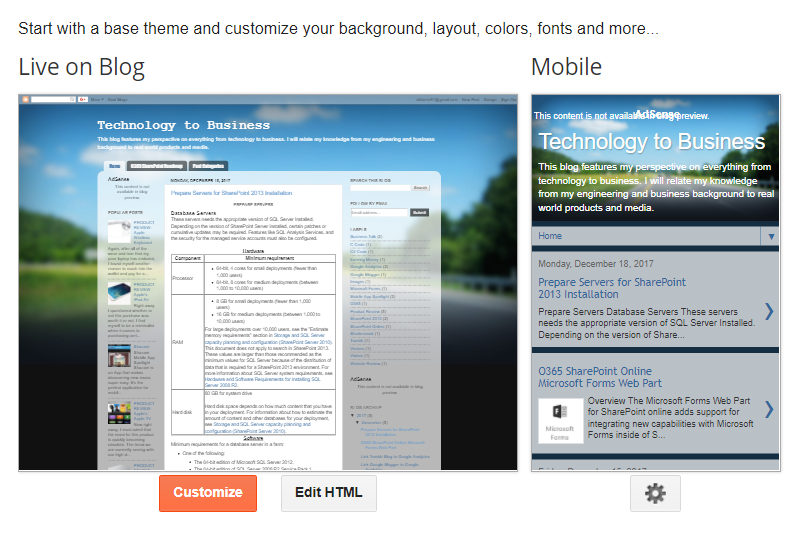
1. Select Theme from the management dashboard
2. Under the preview of your blog, select the Edit HTML button
3. In the text editor, add your internal or external style references to the page <head> section.
<script src="https://cdn.rawgit.com/google/code-prettify/master/loader/run_prettify.js"></script>
4. Select Save Theme to commit your changes
Google Prettify Usage
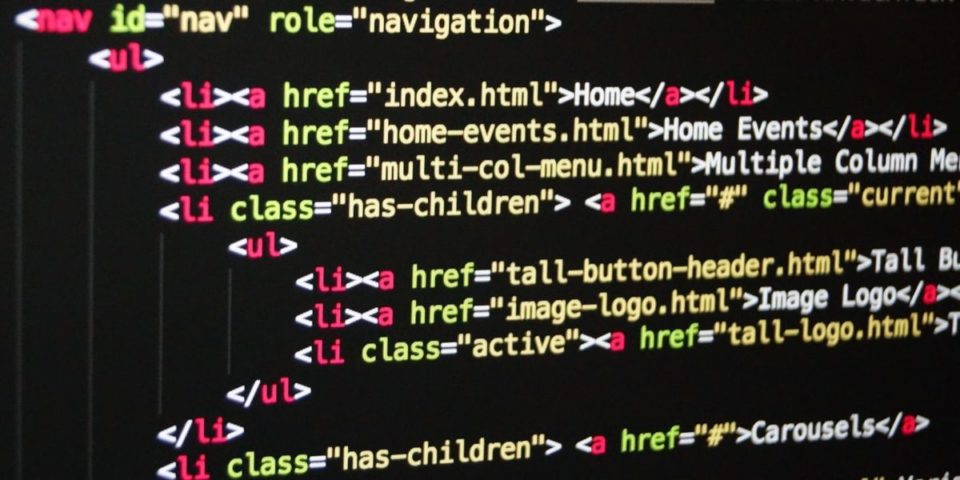
Within your site page or post, simply wrap your code with the <pre> tag and assign the “prettyprint” class.
Usage without specifying language (e.x. “HTML”)
<pre class="prettyprint"></pre>
Usage with specifying language
<pre class="prettyprint lang-html"></pre>
Google Prettify Supported Code Languages
The following code languages are supported for syntax highlighting based on their associated file extensions.
“bsh”, “c”, “cc”, “cpp”, “cs”, “csh”, “cyc”, “cv”, “htm”, “html”, “java”, “js”, “m”, “mxml”, “perl”, “pl”, “pm”, “py”, “rb”, “sh”, “xhtml”, “xml”, “xsl
Google Prettify Theme Gallery
The library supports standard styling and formatting. The full gallery of options can be found here:
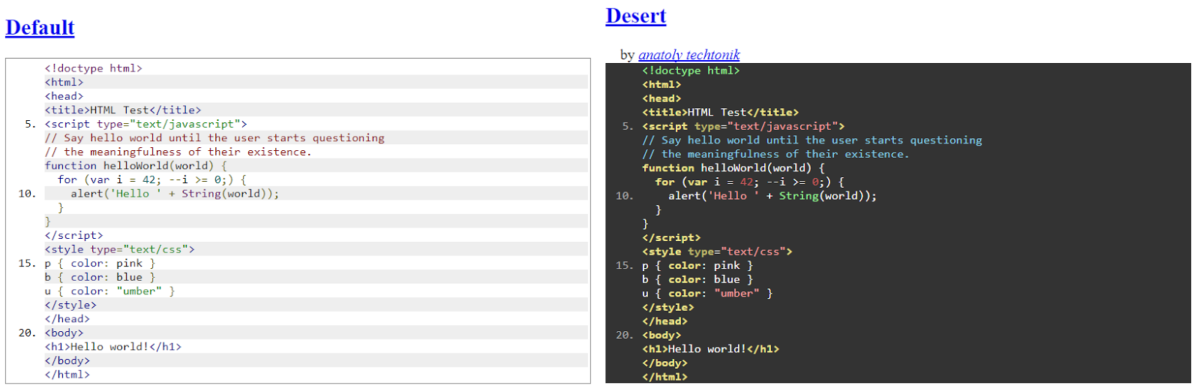
Using a standard theme is as easy as referencing the name as a query string parameter.
<script src="https://cdn.rawgit.com/google/code-prettify/master/loader/run_prettify.js?skin=sunburst"></script>
Google Prettify Custom Formatting
You can override any of the standard themes in Google Blogger by adding your own custom formatting.
1. Select Theme from the management dashboard
2. Under the preview of your blog, select Customize
3. Under Advanced, select Add CSS
4. Prepare the custom CSS using the text editor
5. Review the updates in the preview window and select Apply to Blog
Google Prettify Examples
//Show all line numbers
li.L0,li.L1,li.L2,li.L3,li.L5,li.L6,li.L7,li.L8 {
    list-style-type: decimal!important
}
//Modify Font Size
.prettyprint {
font-size: 12px !important;
}

//Decrease the padding around the line numbers
ol.linenums {
padding-left: 25px !important;
}
Line Numbering
Including line numbers is as easy as including the “linenums” class in your <pre> tag. Some themes by default only show numbers in increments of 5, this can be overwritten through custom styling.
<pre class="prettyprint linenums"></pre>
Limitations
Unfortunately, like other syntax highlighters, the library isn’t able to resolve the usage of the “<” and “>” characters that are used frequently in xml based languages.
You must replace each character with their respective encoded values:
- “<” to “<”
- “>” to “>”